

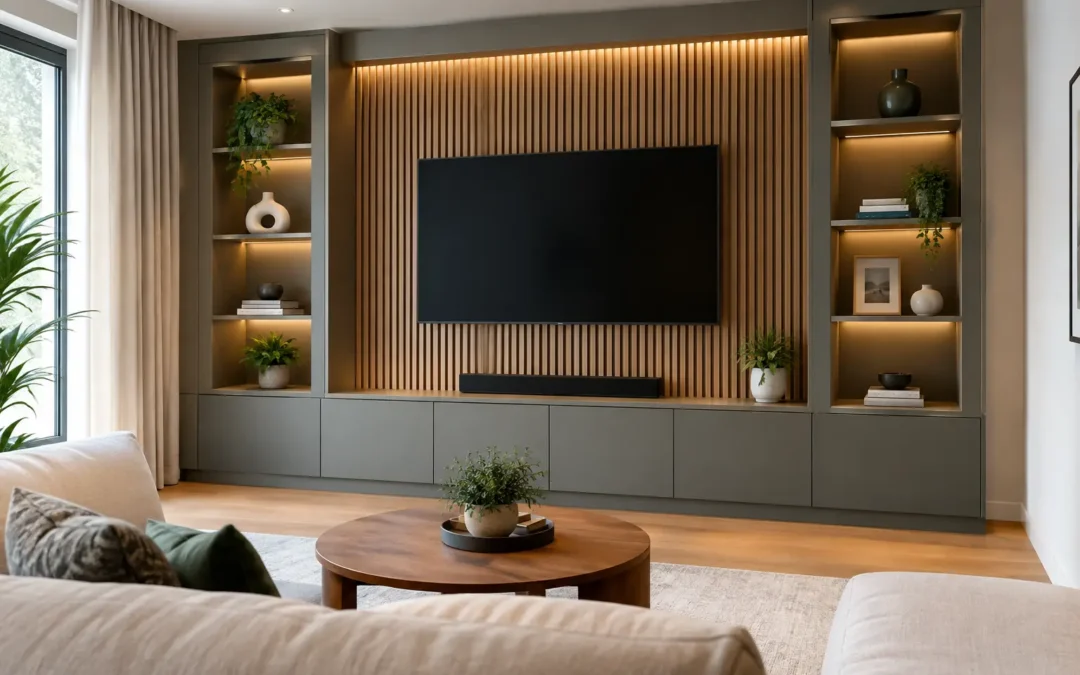
A well-designed media wall does far more than give the television somewhere to sit. This media wall guide explains how to turn a busy living-room wall into a smart, purposeful focal point, with space for technology, storage and display built around the way your household actually lives.
The strongest results do not come from simply boxing in a TV. They come from measured planning: getting the screen height right, hiding the cables properly, choosing useful storage and making sure the finish belongs in the room. Whether you are replacing freestanding furniture or starting with a blank wall, a bespoke fitted design can bring calm and order to one of the hardest-working spaces in the home.
Start with how the room is used
Before choosing a finish or deciding whether you want a fireplace, think about what happens in the room every day. Is it where the family watches films, where children keep games consoles and controllers, or where you want a quieter, more formal space for entertaining? The answer affects every part of the design.
A family room may need deep closed cupboards for toys, devices and board games, with durable finishes that are easy to live with. A more refined sitting room might suit slim cabinetry, open shelves for books and carefully chosen objects, and a painted finish that coordinates with wall panelling or joinery elsewhere in the home.
It also helps to be honest about what needs to be stored. Soundbars, routers, gaming consoles, Sky boxes, speakers and plugs all need a home. Designing around these items from the outset avoids the common problem of a beautiful feature wall with cables, extension leads and equipment left on show.
Media wall guide: get the layout right first
The television should sit at a comfortable viewing height, rather than being positioned purely for symmetry. In most living rooms, the centre of the screen works best close to seated eye level. This changes depending on the sofa height, screen size and viewing distance, so it is worth considering the whole seating layout before fixing dimensions.
A fireplace beneath the TV can look impressive, but it introduces a trade-off. It may raise the screen higher than is comfortable for long viewing sessions. A low, linear electric fire is often easier to accommodate than a deeper feature, but the final choice should always be led by proportions and how the room will be used.
The width of the media wall matters too. A narrow central panel can make a large television appear dominant, while cabinetry or shelving to either side gives it a more balanced, built-in appearance. In a smaller room, full-width fitted furniture can make the wall feel calmer because every element is intentional. In a larger room, a central feature with surrounding storage can add presence without leaving the wall looking sparse.
Consider sightlines, light and sound
Think about where daylight enters the room and whether windows will reflect on the screen. If glare is likely, the TV position or window treatments may need to change. Wall-mounted speakers and soundbars also need careful positioning, particularly where shelves or cabinetry could obstruct sound.
If you are planning an electric fire, check the manufacturer’s clearance requirements before the cabinetry is designed. This is not a detail to solve on fitting day. Heat management, ventilation and access for maintenance should be built into the plan from the beginning.
Plan the technical details before fitting
The cleanest media walls have one thing in common: the technology has been thought through before the decorative finishes go on. A professionally planned installation allows cables to run out of sight, while leaving suitable access to power sockets and equipment.
At a minimum, consider power for the TV, fire, soundbar, internet equipment and any lighting. You may also need aerial, ethernet or HDMI connections, depending on the devices you use. Wireless systems reduce some wiring, but they do not remove the need for practical power and ventilation.
Cabinets housing consoles, routers or amplifiers should not be completely sealed. Equipment produces heat, and signal strength can suffer when devices are hidden inside unsuitable units. Discreet ventilation, cable ports and doors that allow remote controls to work can all be incorporated without spoiling the finished look.
For a fitted project, these checks are particularly valuable:
- Confirm where every socket, cable and control point will sit before manufacture begins.
- Allow ventilation around devices that generate heat.
- Include access panels or removable sections where future servicing may be needed.
- Check the wall construction and TV bracket specification for the size and weight of your screen.
A little extra planning here prevents expensive alterations later and keeps the installation looking as tidy in five years as it does on day one.
Choose storage that earns its place
A media wall can be decorative, but it should also solve a problem. Closed base cabinets are ideal for the items that create visual clutter: remotes, games, paperwork, chargers and children’s toys. Tall side cupboards can provide generous storage for books, blankets or household items that do not have an obvious home elsewhere.
Open shelving has a different role. It adds depth, makes the design feel lighter and gives you space to personalise the room. The key is restraint. A few books, ceramics, framed photographs or a trailing plant will look considered; shelves packed tightly with miscellaneous items can quickly undo the calm effect of a fitted wall.
There is no rule that says every media wall needs open shelves. For clients who prefer a clean, contemporary look, handleless doors and uninterrupted painted cabinetry can be the better choice. If the room already contains plenty of texture through curtains, rugs and soft furnishings, simpler joinery often provides the balance.
Select finishes that suit the rest of the home
Your media wall should feel like part of the room, not a separate showroom display. Painted cabinetry in a colour matched to your scheme can create a tailored, architectural effect. Soft neutrals work well where you want the joinery to blend in, while deeper greens, blues or charcoals can make the wall a confident focal point.
Texture can add character without making the design feel busy. Slatted panelling, timber-effect finishes, stone-look surfaces or a contrasting back panel behind shelving can all work well when used in the right proportion. The room’s natural light is important here. Dark finishes can feel rich and elegant in a bright, generous space, but may make a compact room feel enclosed if used wall to wall.
Lighting deserves the same consideration. Warm LED lighting within shelves can create atmosphere in the evening and help display features stand out. It should be subtle, though. Lighting that is too cool, too bright or visible as individual dots can make a carefully made wall look less refined.
Why bespoke design makes the difference
Off-the-shelf units can be useful for a quick update, but they rarely deal neatly with uneven walls, alcoves, skirting boards, ceiling heights and the amount of storage a household genuinely needs. A bespoke media wall is designed around those details, which is why it can look truly fitted rather than assembled.
With a tailored approach, cabinet depths can be adjusted to protect floor space, shelves can be sized around your collection, and doors can align precisely with the rest of the design. You can also choose the finish, internal layout and proportions that suit your home rather than accepting standard sizes.
At WOW Interior Design, the process begins with understanding the room and your requirements in person. Accurate measuring, practical design development and professional fitting mean the decorative choices and technical details are considered together, rather than left for separate trades to resolve.
Give the design room to work
The best media wall is not necessarily the largest, darkest or most heavily lit. It is the one that gives your television and technology a proper home, removes everyday clutter and makes the room feel more settled. Start with your routine, plan the technical elements early and choose a fitted design that will still serve your home well as your needs change.